MY FIRST COVER PROCESS, SIX EASY STEPS
MY FIRST COVER PROCESS, SIX EASY STEPS: The very first comic book cover I professionally drew was for ‘Battlestar Galactica: Six’, issue #4, dated April, 2015.
So what now follows is my explanation about how I broke down the process of creating it. But before I do that, I would like to share with you the message the editor sent to me in regards to its specifications and his general request.
Please Note: This message was a highly private discussion that was considered very TOP SECRET at the time! 007 Style! Here’s how it goes:
Hi Rod,
We’d like you to draw the covers for the ‘Battlestar Galactica: Six‘ series, for issues #3, #4, and #5. But can you please do the cover for #4 first? Here is the solicit copy for the issue.
Battlestar Galactica: Six #4 — Number Six, like the other humanoid Cylons, has been designed to be human in every way. If that’s the case, then how can she be sure what she really is on the inside? In order to know the truth for certain, she’ll have to take a leap of faith. But will she fly high or crash and burn?
So when can you provide cover layouts for me to look at?
Many thanks, The Editor.
– – – – – – – – – – – – – – – – – – – – – – – – – – – – – – – – – – – – – – – – – – – – –
Battlestar Galactica: Six #4
I was obviously really excited about this opportunity and wanted to work on it straight away! So what now follows is the six-step process I used in order to create it.
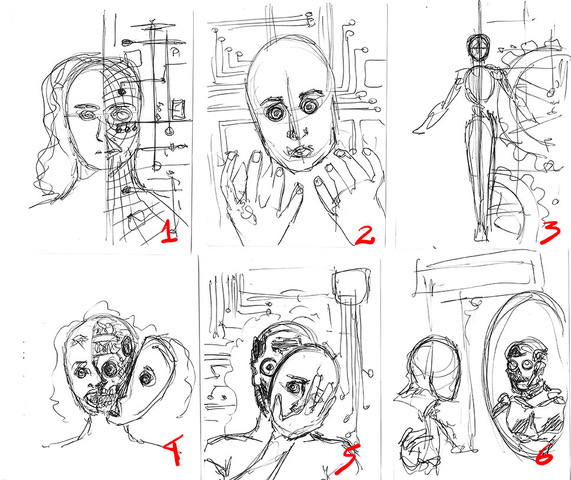
Thumbnails

Pencils
 |
3) Now it’s time to sketch the idea in the real size. I like to use a blue or redbrush when sketching (just a personaltaste of mine). |
Cleaning Pencils
 |
4) At this stage of the creation process I like to change the opacity of this layer & create a new layer called pencils to tighten things up. |
Character Inks
 |
5) After that is done, try to turn offyour sketch layer & change the opacityof the pencils, before creating anew layer called inks & start inking. |
Background Inks
 |
6) Now that you have completed thecharacter you’ll have to create a newlayer & draw the backgroundbehind them. |
Title & Colors

When finished, save your cover in 400dpi, CMYK, TIFF format, and send it over for approval. Once it’s approved it will be sent to the colorist and the logo of the issue will be inserted. Congratulations!! You now have your first comic book cover!!!
NEXT: How To Create a Great Portfolio.
This article was brought to you by Brazilian born, Rod Rodollfo from Alpha Brain Art Studio. Please feel free to download the Master Page Template used by Rod on many Published Comic Books by signing up here! And while you’re at it, don’t forget to follow him on his website, twitter, and facebook pages.
Disclosure: There may be affiliate links on this page, meaning, at no additional cost to you, I will earn a commission if you click through and make a purchase. Help creators by clicking.